Lenovo Yoga C940-14IIL (Type 81Q9) Battery Replacement — From Symptoms to a Safe Swap
Model covered: Lenovo Yoga C940-14IIL Laptop (ideapad) — Type 81Q9
Quick Summary (Jump to a Section)
1) Common Signs Your Yoga C940-14IIL Battery Needs Replacement
| Symptom (Customer Perspective) | What You’ll Notice | Why It Matters |
|---|---|---|
| Rapid drop from ~30–50% to 0% | Sudden shutdowns even with charge remaining | High internal resistance / degraded cells can’t deliver peak current. |
| Very short runtime | Battery lasts minutes instead of hours | Capacity loss after many cycles or heat exposure. |
| Won’t charge past a certain % | Stuck at 60–80% or oscillates | Wear level high; calibration or cell imbalance; often end-of-life. |
| Battery status “Replace” / “Not Detected” | Windows/Lenovo utility flags service required | Firmware reports poor health or failure to communicate. |
| Overheating while charging | Fan ramping, warm palm rest, throttling | Degraded cells dissipate more heat; safety concern. |
| Physical swelling | Touchpad raised, case gap, creaking | Stop using immediately. Swollen packs can damage hardware. |
| Inconsistent power on battery | Random freezes only when unplugged | Voltage sag under load—classic aging sign. |
| Age & cycle count | >2–3 years heavy use; high cycle count | Normal lithium-ion wear—time to refresh. |
2) Battery Problem Diagnosis Checklist
Tick the boxes that match your situation. If 2 or more are true, we recommend replacing the battery.
Checked: 0
3) Verify the Battery Is the Culprit (Before You Buy)
| Check | How to Do It | Interpretation |
|---|---|---|
| Windows Battery Report | Open Command Prompt (Admin) → run powercfg /batteryreport → open the HTML report it creates. |
Compare Design Capacity vs Full Charge Capacity. If Full is much lower (e.g., <60–70%), the pack is worn. |
| Lenovo utility | Use Lenovo Vantage or diagnostics to view battery health and cycle count. | Warnings like “Battery needs replacement” confirm the diagnosis. |
| Behavior on AC | Use the laptop on AC power with the battery at low charge. | If issues vanish on AC but return on battery, the battery is likely at fault. |
| Visual safety check | Inspect for gaps, lifted touchpad, or bulging. | Swelling = stop using and replace immediately. |
| Calibration (optional) | Charge to 100% → discharge to 5–10% → recharge to 100% once. | Helps the gauge; it won’t fix true wear. If no improvement, replace. |
4) Parts, Tools & Safety
| Item | Details | Notes |
|---|---|---|
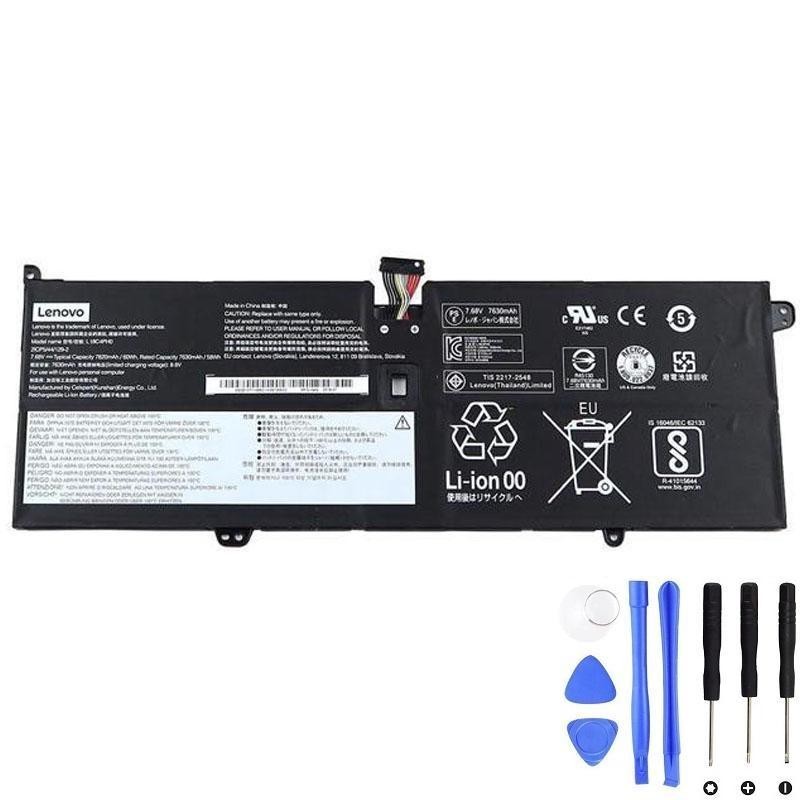
| Replacement battery | Lenovo L18C4PH0, 60Wh | Fully compatible with Yoga C940-14IIL (Type 81Q9). |
| Screwdriver | Torx T5 or Phillips PH0 | Different sub-variants may use different screws. Inspect before starting. |
| ESD protection | Anti-static wrist strap (recommended) | Work on a non-conductive surface; avoid static damage. |
| Pry tools | Plastic spudger / guitar pick | For lifting rubber foot and clips safely. |
| Containers | Small cups or magnetic mat | Keep the seven bottom screws and four battery screws organized. |
5) Compatible Battery Models & Lenovo Part Numbers
These OEM part numbers are commonly used for the Yoga C940-14IIL (Type 81Q9). They are all 7.68V, 60Wh, 4-cell packs. Label names may vary by supplier or region, but the specifications and fit are equivalent. Always match voltage, capacity, connector orientation, and physical shape.
| Title / Label on Pack | Lenovo Part No. (FRU/PN) | Spec | Role | Buy Link |
|---|---|---|---|---|
| CP/C L18C4PH0 | 5B10T11586 | 7.68V • 60Wh • 4-cell | Primary model for this guide | Product page |
| SP/A L18M4PH0 | 5B10T11585 | 7.68V • 60Wh • 4-cell | Direct substitute / equivalent | — |
| Lenovo BATTERY 4cell 60 Wh 7.68V | 5B10W67180 | 7.68V • 60Wh • 4-cell | Direct substitute / equivalent | — |
| Lenovo BATTERY, 7.68V, 60 Wh, 4cell | 5B10W67374 | 7.68V • 60Wh • 4-cell | Direct substitute / equivalent | — |
6) Step-by-Step Battery Replacement (Yoga C940-14IIL, Type 81Q9)
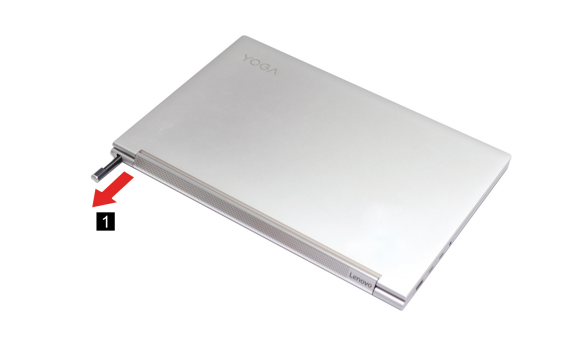
A. Remove the Active Pen
- Pull the active pen out of the slot.
B. Remove the Lower Case
- Disconnect all power cords, cables and USB devices from the computer.
- Place the computer upside down on a flat, clean surface.
- Peel off the long rubber foot from the right and left ends, then remove the entire rubber foot strip.
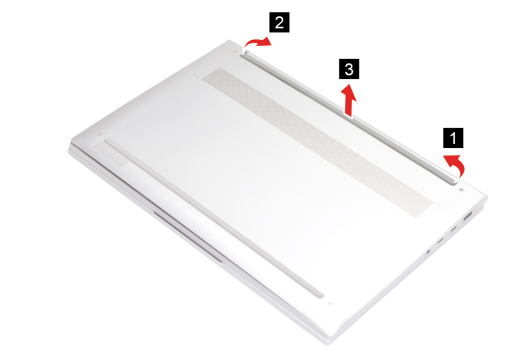
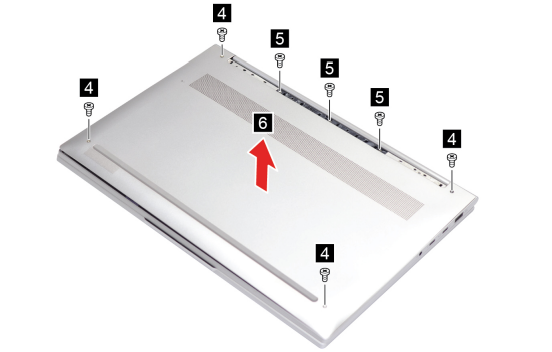
- Remove the seven screws and lift off the lower case.
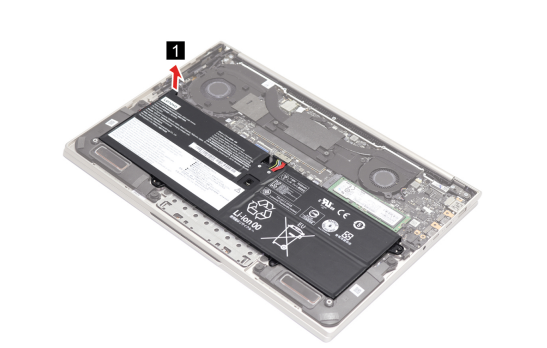
C. Remove the Battery Pack
- Remove the small rubber piece (battery insulator/cover) shown below.
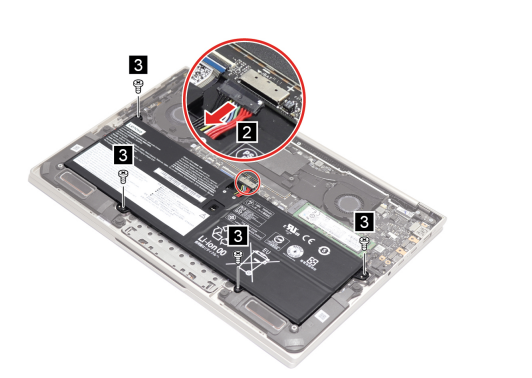
- Disconnect the battery cable from the system board, then remove the four battery screws. Attention: Do not pull the cable. Use your fingernail to gently walk the connector out.
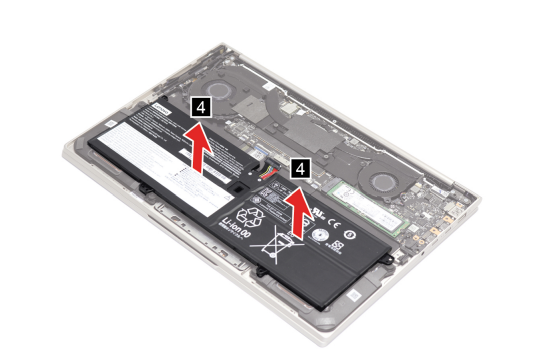
- Lift and remove the battery pack carefully.
7) Reassembly, First Boot & Battery Calibration
- Position the new L18C4PH0 60Wh battery, align holes, and install the four battery screws (snug, not overtight).
- Reconnect the battery cable to the system board (ensure it’s fully seated).
- Reinstall the rubber insulator piece.
- Re-fit the lower case and reinstall the seven screws.
- Press the long rubber foot strip back into place along the bottom edge.
- Reinsert the active pen into its slot.
- Connect AC power and power on. If the clock reset, set date/time in Windows.
- Calibrate (recommended): Charge to 100% → use on battery to 5–10% → charge back to 100% once. This helps the battery gauge learn true capacity.
8) FAQ, Care Tips & Safe Disposal
Is this the right battery for my exact model?
Yes—this guide and the L18C4PH0 (60Wh) battery target the Lenovo Yoga C940-14IIL (ideapad) — Type 81Q9.
What if my laptop still shuts down after replacement?
Run the Windows battery report again. If the behavior persists only on heavy load, check for background apps, thermals, or run Lenovo diagnostics to rule out board-level issues.
How do I make the new battery last longer?
- Avoid heat; keep vents clear.
- Shallow cycles (20–80%) are gentler than deep cycles.
- If on AC for long hours, enable manufacturer charge thresholds if available.
How do I dispose of the old battery?
Do not throw lithium-ion in the trash. Use certified e-waste or retail drop-off recycling in your area.