A field-ready walkthrough of Lenovo’s internal + external battery design in the 12.5″ A275: how it works, how long it lasts, what fails, how to fix it, and the exact batteries to buy.
What Power Bridge Means on A275
The ThinkPad A275 brings AMD-powered mobility to Lenovo’s business lineup, and it inherits a power architecture many road warriors swear by:
an internal battery inside the chassis plus a rear, removable external battery. Together, they make up
Lenovo’s Power Bridge system—designed for hot-swapping and all-day endurance.
Design: Internal + External
Hot-swap: Yes (external)
Typical totals: ~48 Wh
Architecture & Policy (Internal + External)
- Internal battery (~24 Wh) — sealed inside; acts like a built-in UPS so the laptop stays on while you swap the rear pack.
- External battery (~24 Wh) — user-replaceable at the back; latches in/out in seconds.
- EC/BIOS policy — typically biases discharge toward the external pack first, preserving the internal pack for hot-swap and long-term health. On AC, charge sequencing often tops the internal to a safe level before finishing the external.
Runtime Math & Planning
Use the simple planning formula:
Runtime (hours) ≈ (Internal Wh + External Wh) ÷ Average W
On a well-maintained A275, expect ~6–9 W for office/web, and 10–15 W when busier. Ambient temperature, brightness, radios, and battery age matter.
| Battery Combo | Total Energy | ~6 W | ~9 W | ~12 W | ~15 W |
|---|---|---|---|---|---|
| Internal 24 + External 24 | 48 Wh | ≈ 8.0 h | ≈ 5.3 h | ≈ 4.0 h | ≈ 3.2 h |
Enabling charge thresholds (Windows: Lenovo Vantage; Linux: TLP) when desk-bound reduces time at 100% and slows capacity fade.
Hot-Swap Workflow (30-second drill)
- Confirm the internal battery is > 20%.
- Pause heavy tasks (VMs, compiles) for a minute to lower draw.
- Slide the latch and remove the rear battery; insert the fresh pack until it clicks.
- Open your OS battery panel to verify both packs are detected.
If the new pack doesn’t register immediately, reseat it or briefly connect AC to “wake” the gauge.
Buy the Right Batteries (Clickable, FRU-Matched)
Match the FRU/part number on your current labels before ordering. That’s the most reliable way to avoid connector/voltage mismatches.
Internal Battery for A275 (~24 Wh)
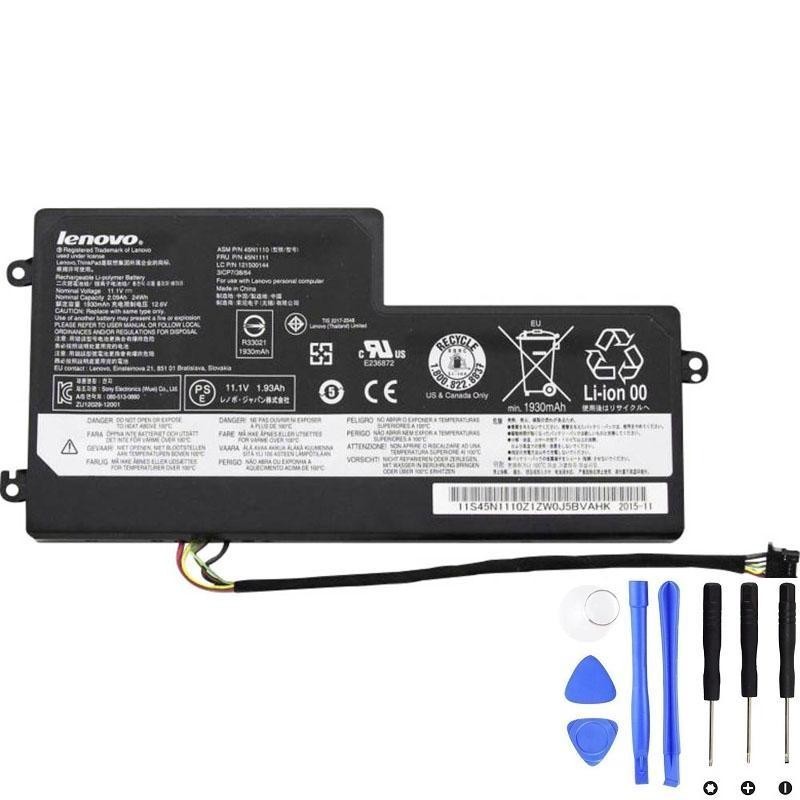
- Who it’s for: A275 owners replacing the built-in pack to restore baseline runtime.
- Why it’s right: Matches the internal slot and cabling; ideal when the original pack has high cycle count or swelling.
External Battery for A275 (~24 Wh)
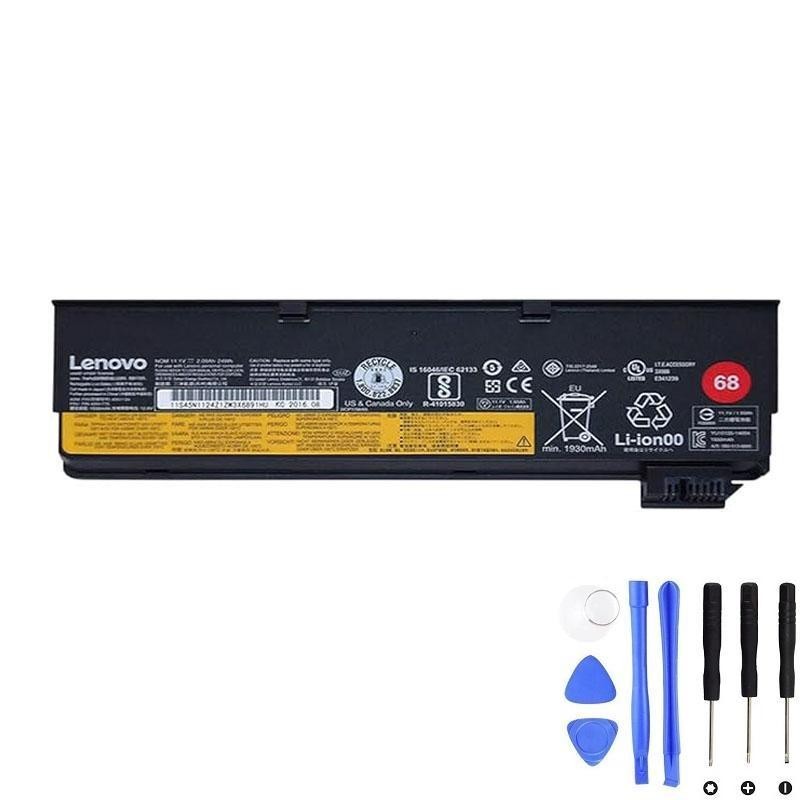
- Who it’s for: Daily commuters who value light weight and a flush back edge.
- Why it’s right: Keeps carry weight low while preserving hot-swap capability for continuous work.
Note: Some ThinkPad families support higher-capacity externals (61+/61++). For the A275, stick to the FRUs printed on your current rear battery unless your service manual explicitly lists larger packs as compatible.
When Batteries Go Wrong on the A275: Symptoms, Diagnosis & Replacement
The A275’s dual-battery layout is robust, but lithium-ion packs are consumables. Heat, age, and deep cycles eventually reduce capacity or
trigger faults. Use this section to recognize failing batteries, run quick diagnostics, and decide which pack to replace first.
Top Symptoms & What They Usually Mean
| Symptom | Likely Cause | Quick Checks | Replace? |
|---|---|---|---|
| Runtime collapsed vs. before | Capacity fade from age/heat; higher internal resistance | Check Full Charge Capacity vs Design (Windows Battery Report / Vantage; Linux upower -d) |
Yes if FCC < ~60% of Design or you’ve lost >50% of your typical runtime. Start with the external pack. |
| Shuts off at 20–30% unexpectedly | Gauge drift / imbalance; voltage sag under load | Run a calibration: 100% → rest → light discharge to ~5–10% → uninterrupted full charge | Replace if issue persists after 1–2 calibrations (cells likely degraded). |
| “Plugged in, not charging” | Charge thresholds enabled; temp too hot/cold; aged pack | Disable thresholds in Lenovo Vantage / TLP; try another adapter; cool down | Replace if still stuck and FCC is very low. |
| External battery not detected | Latch/contacts not seated; pack PCB fault | Reseat pack; clean contacts; brief AC connect to “wake” fuel gauge; update BIOS | Replace external if recurring; internal usually fine. |
| Battery swelling (bulge, lifted trackpad/palmrest, gaps) | Gas generation from cell damage/age | Stop using immediately. Power down, unplug, remove external pack. Do not puncture/press. | Immediate replacement. If internal swells, service promptly. |
| Charging very slow / stalls | Adapter limit under load; pack resistance up; thresholds | Test on idle; try 65W adapter; check thresholds | Replace if still slow and FCC is low. |
| Battery error at POST / in Vantage | Pack fault / authentication failure (rare), or board-side issue | Test with only internal, then only external; reseat; BIOS update | Replace the failing pack after isolating which one triggers the error. |
Fast Triage: Which Pack Should I Replace First?
- Start with the external: it accrues most cycles and is tool-less to swap on the A275.
- Re-test runtime. If still poor (and reports show low FCC on the internal), replace the internal pack.
- Any sign of swelling on either pack → stop usage and replace that pack immediately.
How to Pull Health Data (Windows & Linux)
- Lenovo Vantage → Device → Power: see per-battery health, thresholds.
- Run
powercfg /batteryreport, openbattery-report.html:- Compare Design Capacity vs Full Charge Capacity for each battery.
- Check Cycle Count and recent capacity trend.
upower -d→ find each battery’s energy-full vs energy-full-design.tlp-stat -b→ wear level, cycles (if supported), thresholds.cat /sys/class/power_supply/*/ueventfor raw metrics.
Safe Handling & Disposal
- Swelling / damage: power down, disconnect AC, remove the external pack; do not compress or puncture. If the internal is swollen, schedule service.
- Transport & recycle: cover terminals, use a plastic bag, and take to an e-waste or battery recycling point. Follow local rules (air travel often restricts loose Li-ion).
Recommended Replacement Packs for A275
Internal (~24 Wh)
- Replace when: internal FCC < ~60% of design, or unexpected shutdowns persist after external replacement.
External (~24 Wh, hot-swappable)
- Replace first for most runtime complaints; fastest fix and lowest cost.
Service Notes: Internal vs External
- Shut down or keep running (for hot-swap, ensure internal SOC > 20%).
- Slide the latch; pull the battery straight out along the rails.
- Insert the replacement until it clicks; confirm recognition in the OS.
- Power off completely; unplug AC and peripherals.
- Remove bottom cover screws; lift the cover carefully.
- Disconnect the battery cable before lifting the internal pack.
- Install the new 45N1111, route the cable exactly as original, reassemble, boot, and verify both batteries.
If you’re unsure about ESD safety or fine connectors, consult a qualified technician.
Care, Calibration & Storage
- Use charge thresholds on AC (e.g., 40–80%) to cut high-voltage dwell.
- Keep it cool: heat is the #1 capacity killer. Clean vents; don’t leave the laptop in hot cars.
- Avoid deep cycles to 0% unless calibrating; shallow cycling is healthier.
- Calibration recipe: full charge → rest 30–60 min → light discharge to ~5–10% → uninterrupted full charge.
- Store spares around 40–60% SOC in a cool, dry place; top up every 2–3 months.
Compatibility Snapshot
This guide targets the ThinkPad A275 machine-type families:
- 20KC
- 20KD
Important: Always confirm compatibility by FRU on your existing labels—especially the internal pack (45N1111) and the external rear pack (01AV460) referenced here.
Bottom Line
The A275’s Power Bridge setup lets you carry light and still work long. Keep the internal ~24 Wh pack healthy, then choose an external
~24 Wh pack you can swap whenever your day runs long. If runtime has fallen off, start by replacing the external pack; if shutdowns persist
or health metrics show a weak internal, replace that next. With smart charging habits and occasional calibration, the A275 remains a compact,
reliable travel companion.
Internal (~24 Wh)
External (~24 Wh)