Target device: Lenovo T14 Gen 1 (type 20UD, 20UE) Laptop (ThinkPad) — Type 20UE, Machine Type: 20UES08Q1F
Summary (Tap to Jump)
Is It Worth Replacing the Battery?
If your ThinkPad is otherwise healthy and meets your performance needs, a fresh battery is one of the highest-ROI fixes you can make. You’ll restore portability, stop surprise shutdowns, and extend the laptop’s life—often for a fraction of a full replacement.
Battery Problem Diagnosis Checklist
Check everything that applies. If the total is 2 or more, it’s time to replace the battery.
Common Laptop Battery Problems That Justify Replacement
| Problem | What You Notice | Why It Happens | Decision Cue |
|---|---|---|---|
| Capacity Fade | Runtime is a fraction of what it used to be | Normal cell aging; high temps accelerate wear | FCC ≤ 60% of Design → Replace |
| Sag-Induced Shutdowns | System dies at 10–40% remaining | High internal resistance; voltage sags under load | Frequent → Replace |
| Charge/Detect Errors | “Not charging” or “Battery not detected” | Pack electronics or connector degradation | After cable/charger ruled out → Replace |
| Swelling | Bulging palmrest/touchpad; creaking chassis | Gas formation from damaged cells | Immediate power-down → Replace |
| Thermal Throttle on Battery | Sluggish on battery, fine on AC | Weak pack can’t sustain bursts; firmware limits | Consistent behavior → Replace |
Validate with Windows: open PowerShell (Admin) and run powercfg /batteryreport. Compare Full Charge Capacity vs. Design Capacity, check cycle count, and look for abrupt discharge graphs.
What You Need (Tools & Prep)
- Phillips #0/#00 screwdriver
- Plastic pry card/spudger
- ESD strap or frequent grounding
- Small tray for screws
- Paperclip or SIM eject tool
Safety First
- Shut down Windows completely. Disconnect the power adapter.
- Disable the built-in battery in BIOS before opening the system.
- Do not bend, puncture, or compress the battery. If swollen, proceed with extra care.
- Work on a non-conductive surface. Avoid metal tools on board connectors.
Disable the Built-in Battery via BIOS
- Disconnect the power adapter.
- Press the power button.
- Tap the F1 key repeatedly to enter the Setup menu.
- Select the Config menu.
- Select the Power menu option.
- Select Disable Built-in Battery.
- Select Yes in the confirmation box. The system will shut down and the battery is disabled.
Remove the nano-SIM Card Tray
- Insert the open end of a paperclip into the tray hole to release it.
- Remove the tray from the slot.
Open the Base Cover
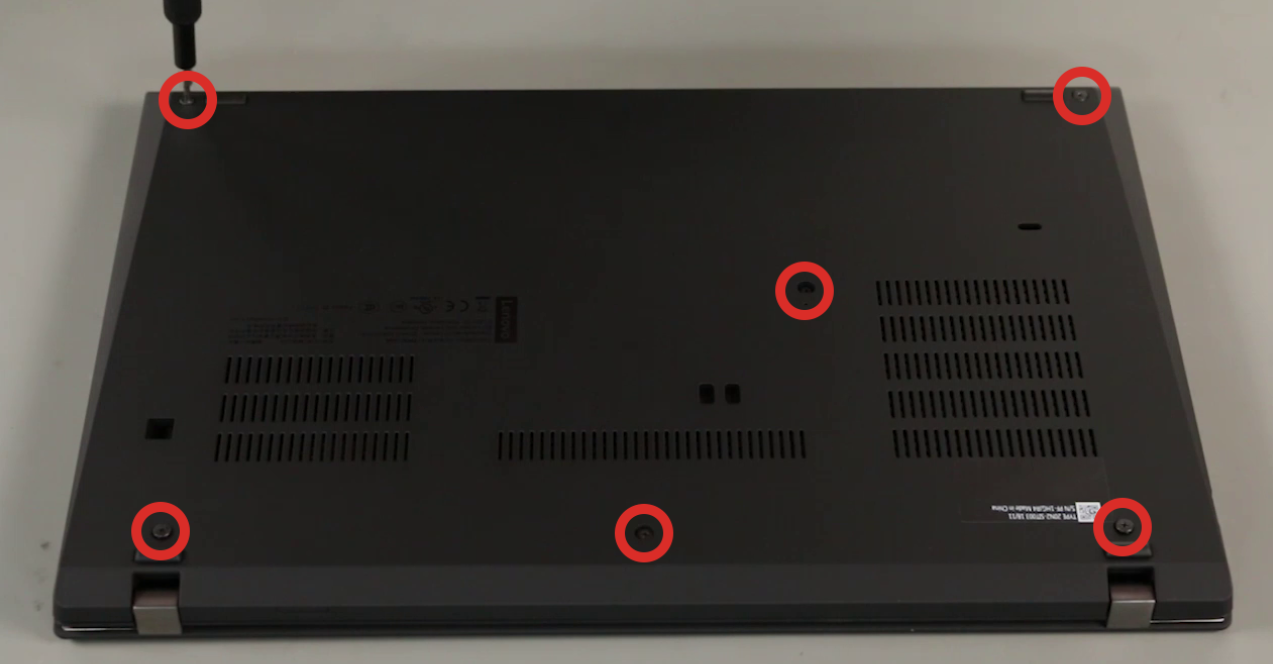
- With the system upside down, loosen six captured screws.
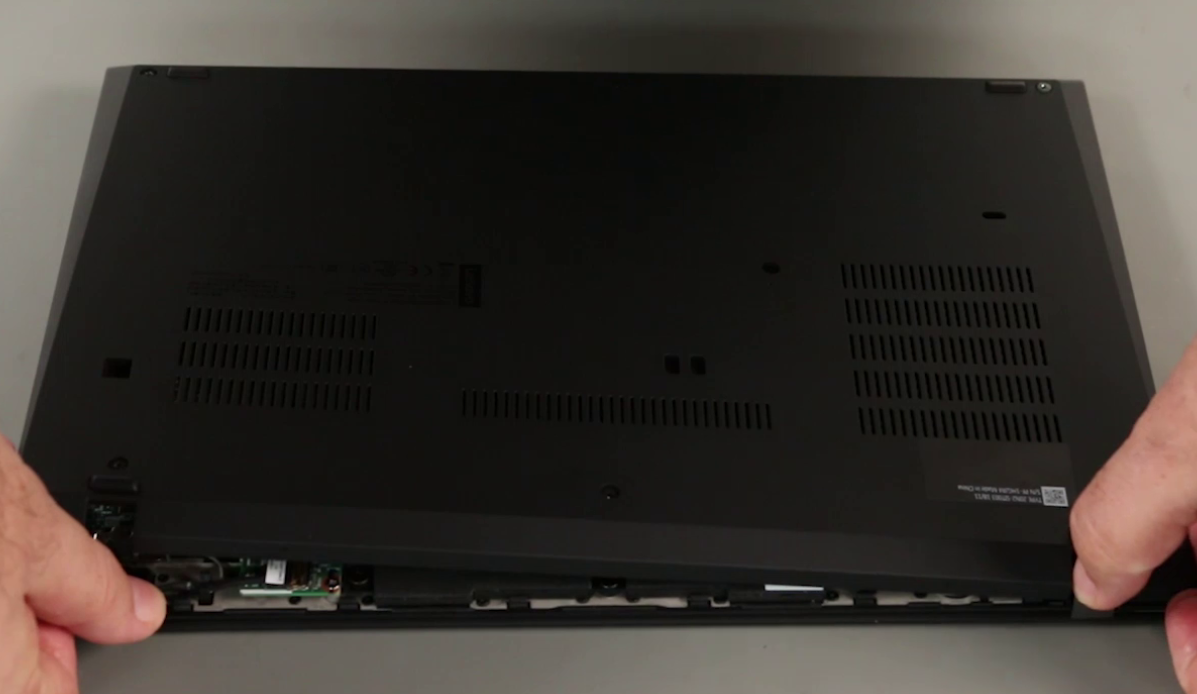
- Starting at the left hinge, gently pry the base cover counterclockwise, taking care not to break clips.
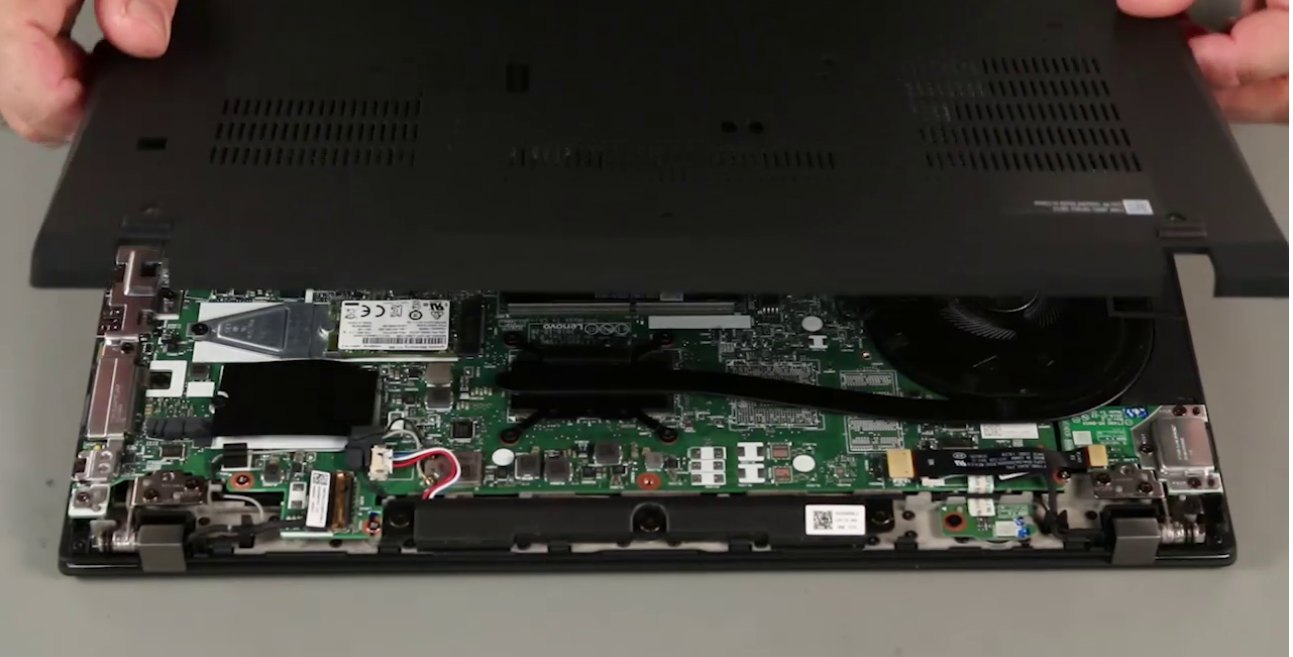
- Lift and remove the cover from the system.
Replace the Built-in Battery
Battery location for reference:
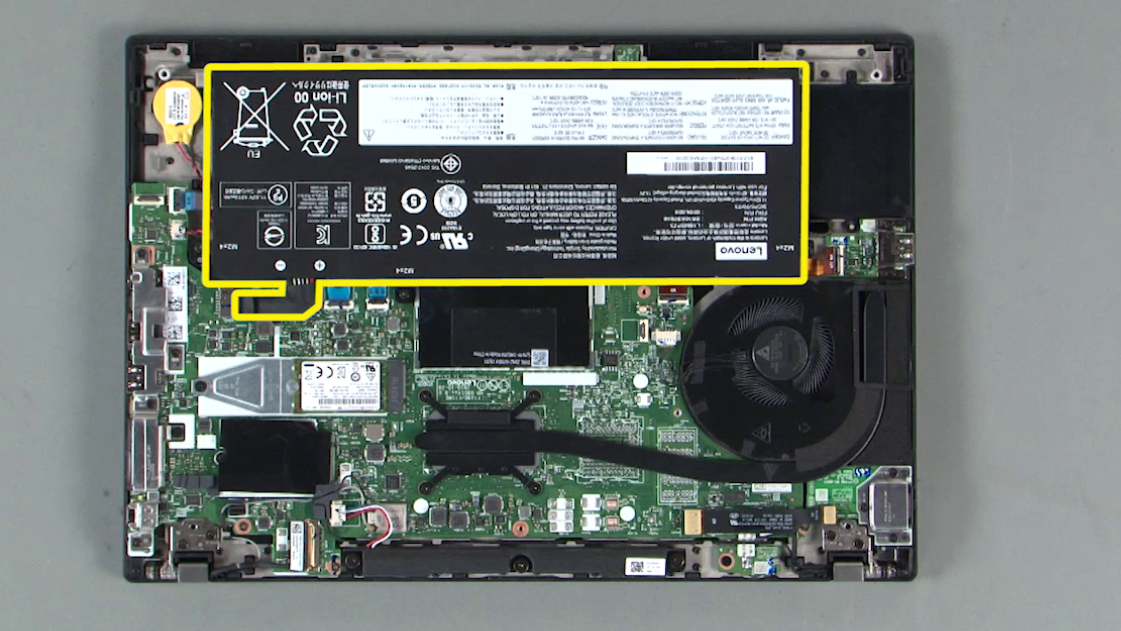
- Disconnect the built-in battery cable from the system board.
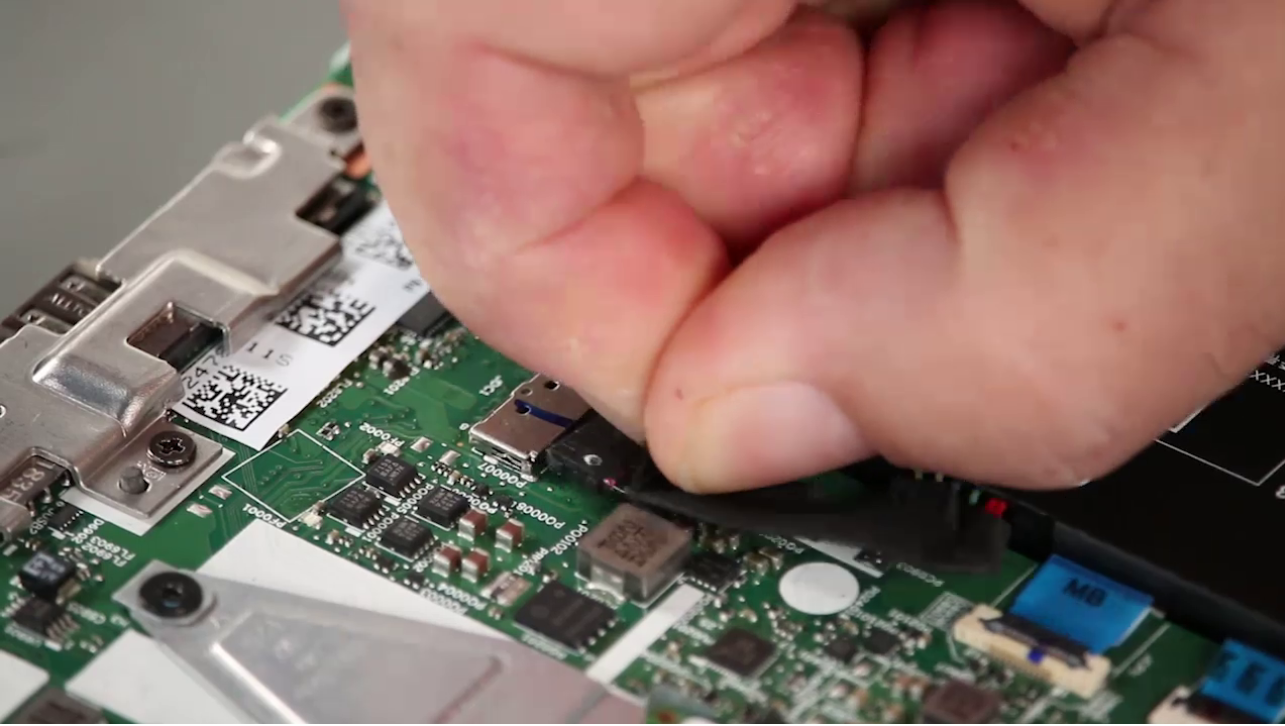
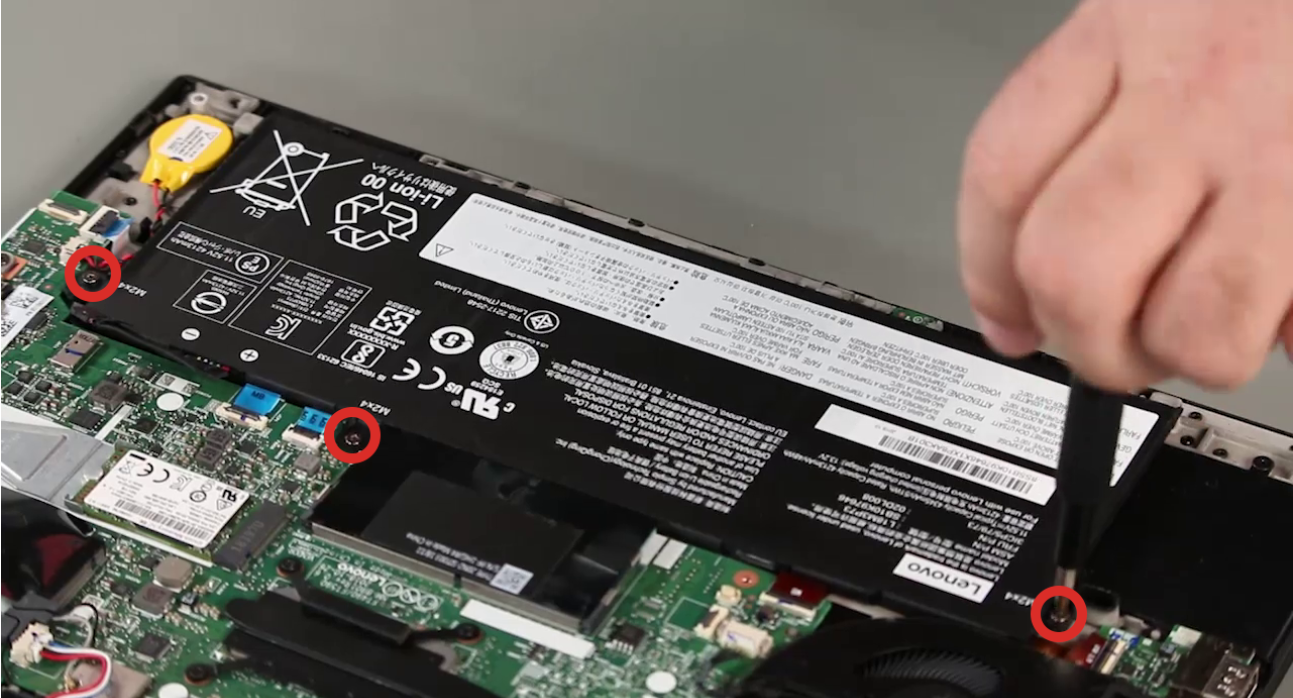
- Remove three screws from the battery (some models use four).
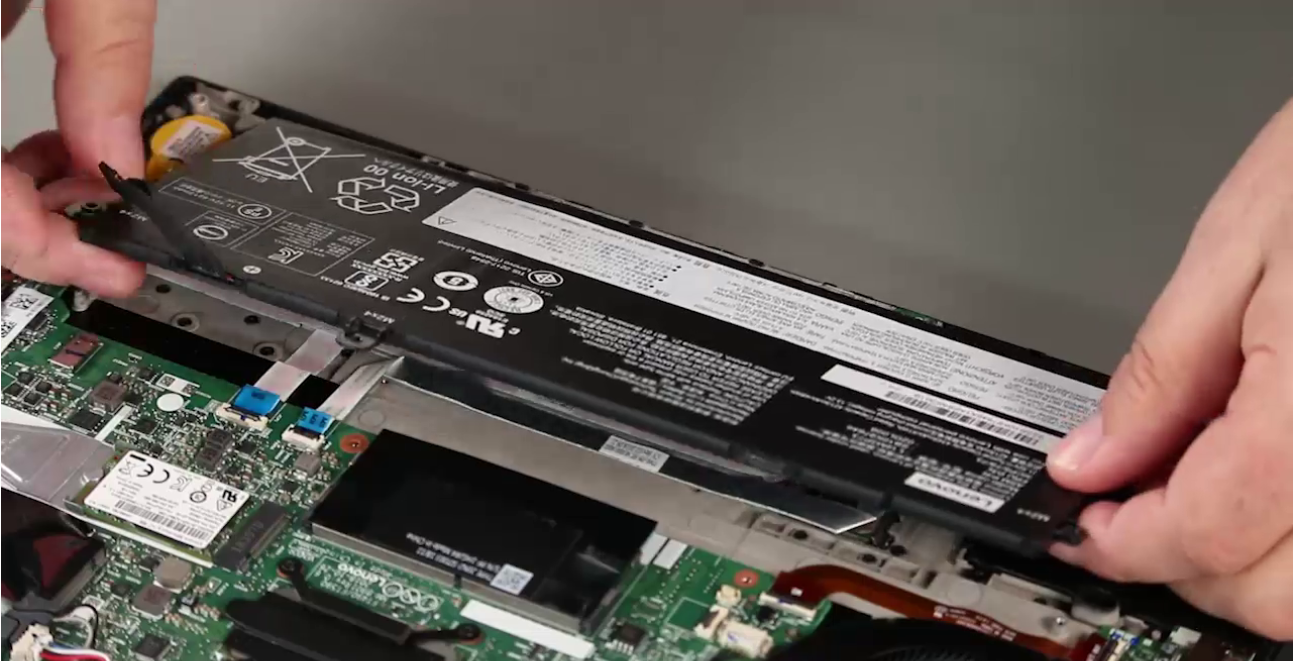
- Lift the battery straight up and out of the system.
- Place the new battery, align holes, reinstall screws snugly, and reconnect the cable firmly.
- Reinstall the base cover, press along edges to latch clips, and tighten the six screws.
- Reinsert the nano-SIM tray.
- Reconnect AC power and power on.
Post-Install: Re-Enable & Calibrate
- Enter BIOS (tap F1) and confirm the battery is enabled or simply boot to Windows; the system re-enables after AC connect.
- Charge to 100%, keep on AC for 30–60 minutes.
- Use on battery down to ~10–15%, then recharge to 100% once or twice to calibrate the gauge.
- Generate a fresh Windows battery report (
powercfg /batteryreport) after a few cycles to verify healthy capacity. - Recycle the old battery at an authorized e-waste facility.
Buy the Correct Replacement Battery
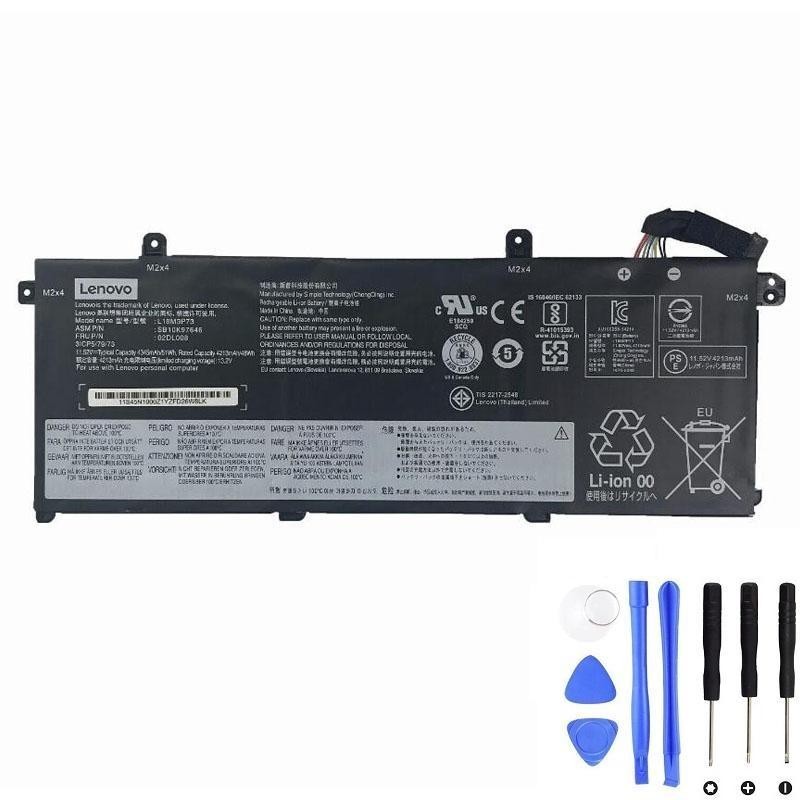
The Lenovo ThinkPad T14 Gen 1 uses a 3-cell internal pack in this family. A compatible replacement example is below. Verify the connector and capacity match your unit before purchase.
Lenovo L18L3P73 51Wh Battery — View Product
FAQ
Do I have to disable the internal battery before opening the laptop?
Yes. Disabling the built-in battery in BIOS removes standby power from the board and reduces the risk of short circuits during service.
My laptop still shuts down early after replacement. What next?
Re-seat the battery connector, update BIOS, run a calibration cycle, and verify Windows isn’t throttling performance due to background tasks or outdated drivers.
Is swelling dangerous?
Yes. Power down, avoid pressure on the chassis, and replace the battery promptly. Do not puncture or compress a swollen pack.